There has been a lot of talk about Metaverse, Virtual Reality, Augmented Reality and Mixed Reality, and I though it would be cool to dig into how they work and how we can use them to our advantage. I’ve chosen Augmented Reality for now because I like how we can overlay additional information over the real world, thus extending our experience of the world around us. I initial started looking into AR glasses but turns out any phone with a camera will do the trick. Unity has been my go to platform for building mobile apps and games. Turns out we can even use it to build AR apps quiet well, so we will be installing that in a bit.
In this blog we are going to try and do something really cool and futuristic. We are going to use AR to present the latest temperature and humidity reading over the Arduino Uno device that took the reading. We will also generate a hyper link, so in one click we can go to the device page on our angular website that we built in an earlier blog. This device page will show us a detailed graph of the readings. This is very cool because we are blending our data with the real world. This makes interacting with the data much easier because we don’t have to browse to our site and search for the device, we can visually see it over the device and we can go to the details in one click.
Let’s start of by generating a QR code. This QR code will be the device name and it will be used by our AR application to uniquely identify our Arduino Uno DHT11 setup. This way we can add more devices, even devices that take other types of readings like light intensity or battery level and our AR application will uniquely identify them. Our AR Unity Application will than use the QR code to query our API and get the temperature and humidity readings. We will then present the latest reading over the QR code in AR. We could even show the highest and lowest reading and other statistics about our devices, but we will save that for another blog.
How to Generate a QR code?
Browse to https://barcode.tec-it.com/en. Navigate to “2D Codes” and select “QR Code”. Enter “dht11-sensor1” in the data text box and click Download. This should generate a QR code like the below. The plan is to print this code and stick it on the Arduino Uno and DHT11 setup we put together in my 1st blog.

Two points to note here: I initially tried the simple Linear Code and the XR Reference Image Library kept on saying “Failed to get enough keypoints from target image.”, so I switched to QR Code. It was much bigger, so it managed to find more keypoints. The 2nd point, I had to resize the QR code to 1024 to 1024 pixels. The initial size was too small and give me the same error again.
How to install Unity?
We are going to used Unity to build our AR application. If you are familiar with C# or any Object Orientated Programming language it is quiet easy to pick up. The only bit I needed to get familiar with is the 3D orientation world. But even that gets easy after working with Unity and 3D after some time.
1.The install file is a single executable file that can be found here
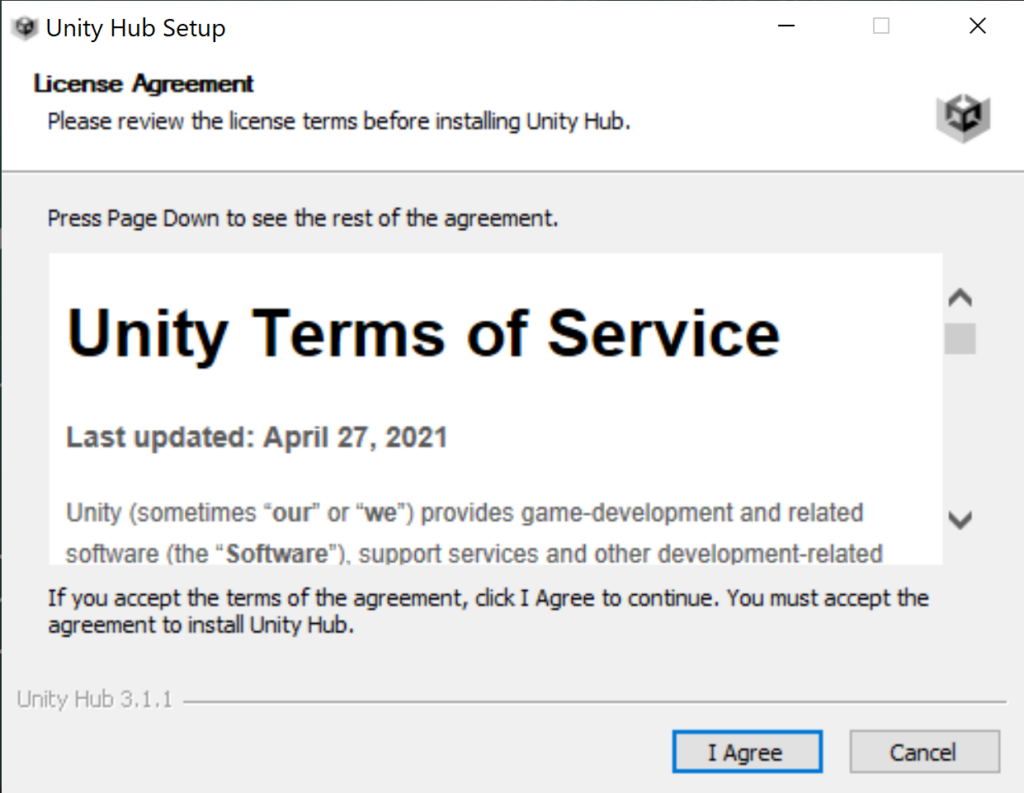
2.After you download the file, run the setup and you should see something like this, please read and accept the terms and click ‘I Agree’
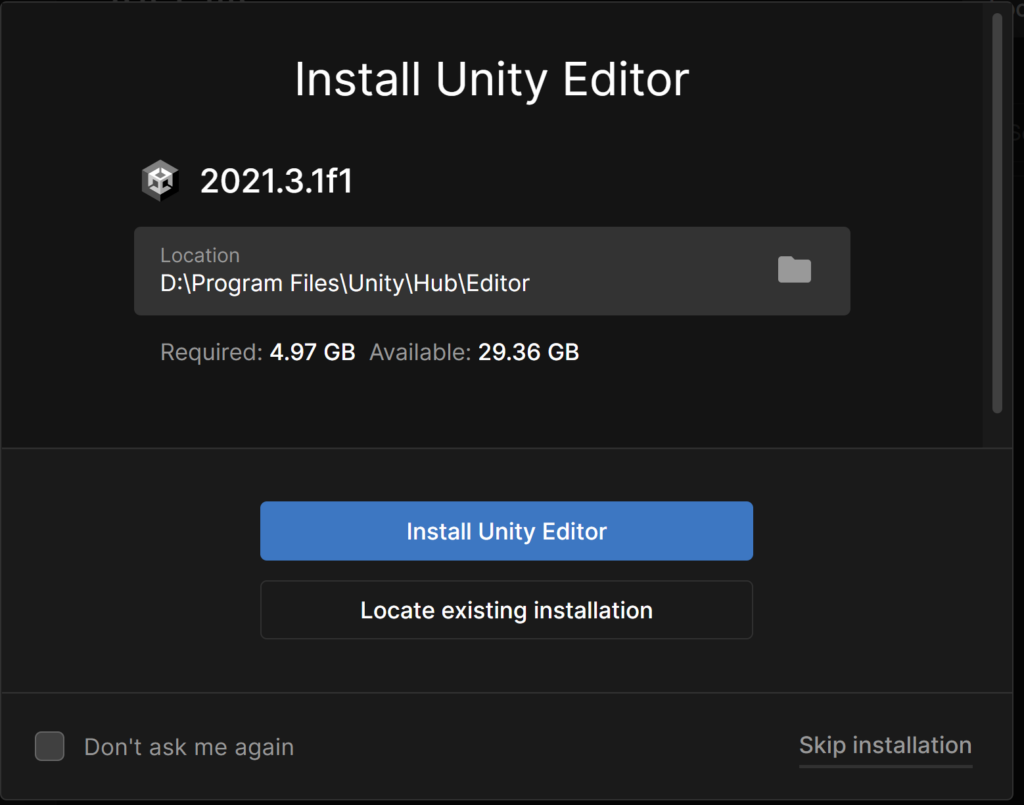
3.On the “Choose Install Location”, leave the default and click “Install”. This should setup Unity Hub, click “Finish” to load the Unity Editor Installer. I’ve changed the location to my D drive but you can leave it as is and click “Install Unity Editor”
4.The install should take some time, so sit back and relax. You should see the below when the install is complete
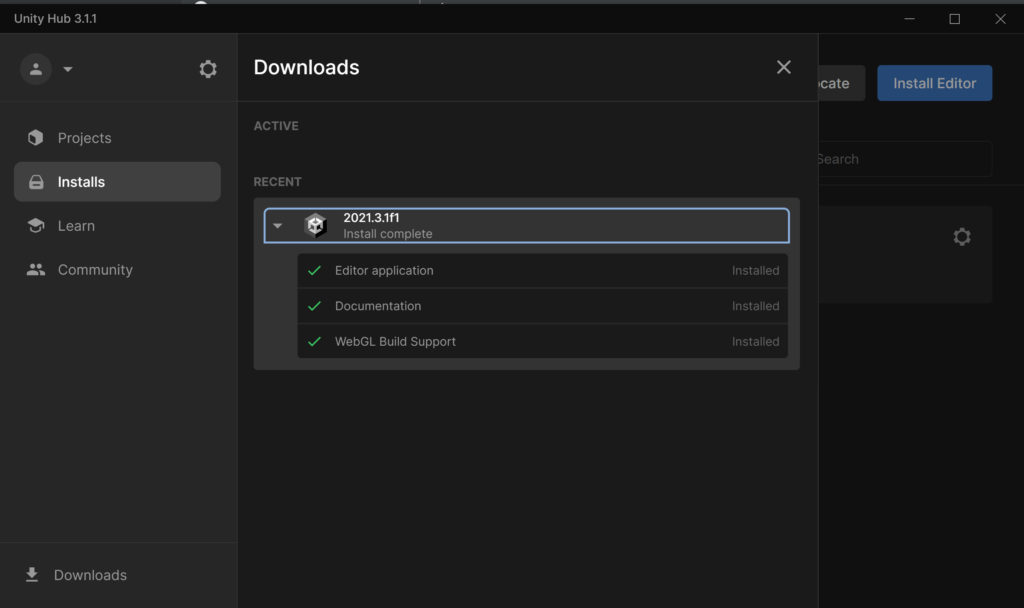
Close this window and we are all ready to build your AR app now
How to build an Image Tracking AR Application using Unity
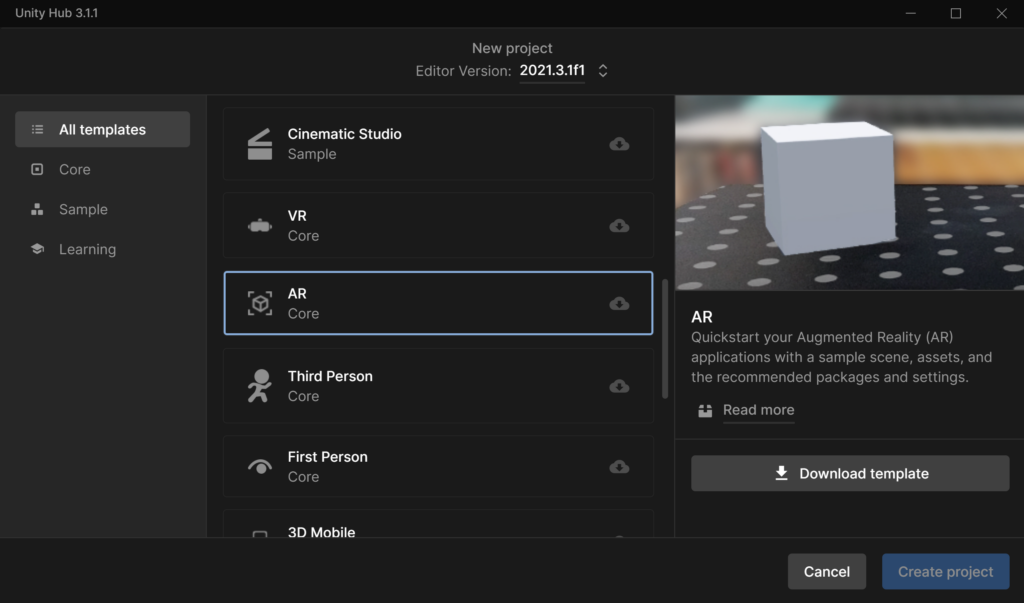
Open Unity Editor and click “New Project”. From the list of options, locate “AR” and click “Download Template”
After the template download is complete, choose a name for your project like “TemperatureAR” and click “Create project”. When the project is ready you should see a “AR Session” object, a “AR Session Origin” object and a “AR Camera” under it, like below. These objects are needed for the AR application to work correctly.

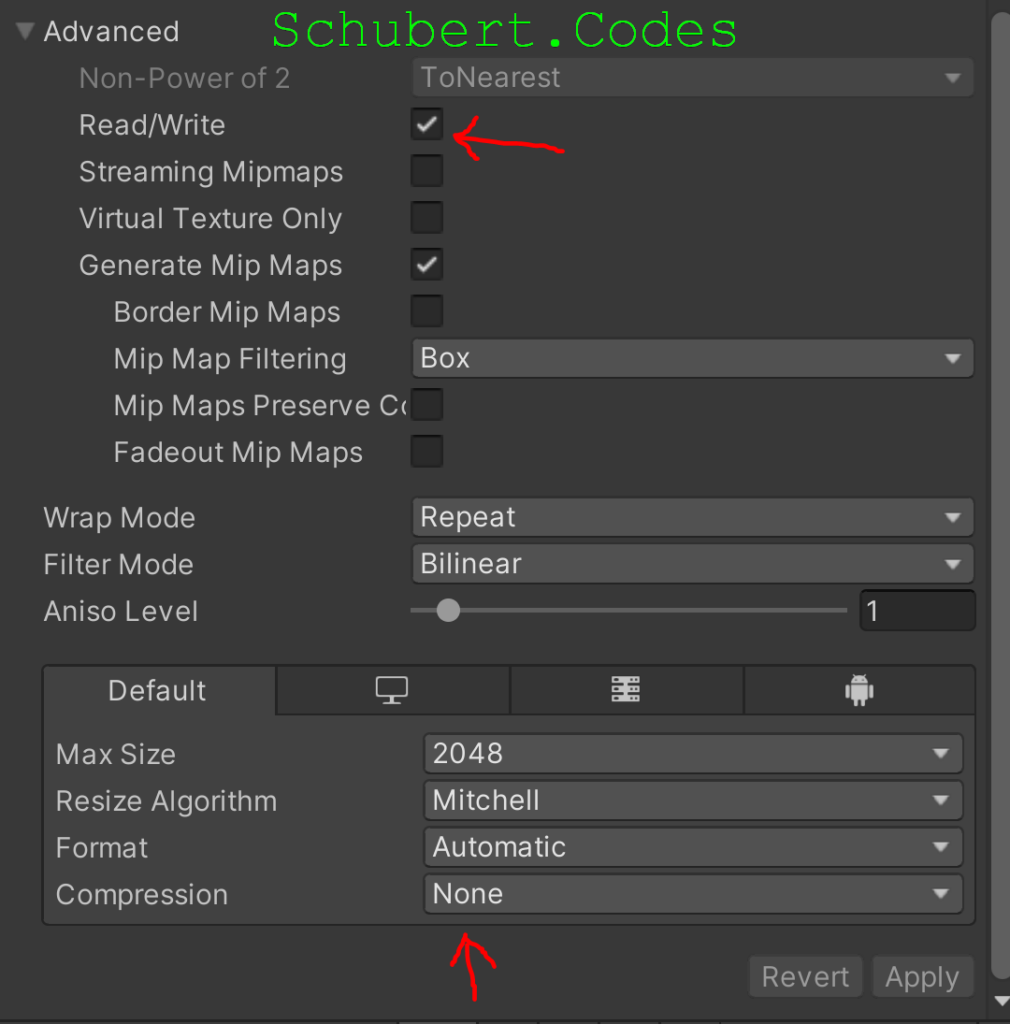
Create two new folder under Assets and call one “Prefabs” and the other “Textures”. Delete all the other folders as they contain sample code. Drop the QR code from earlier into the Texture folder. In the Inspector tab, expand the Advance option and tick the Read/Write option. Also change the compression to None.
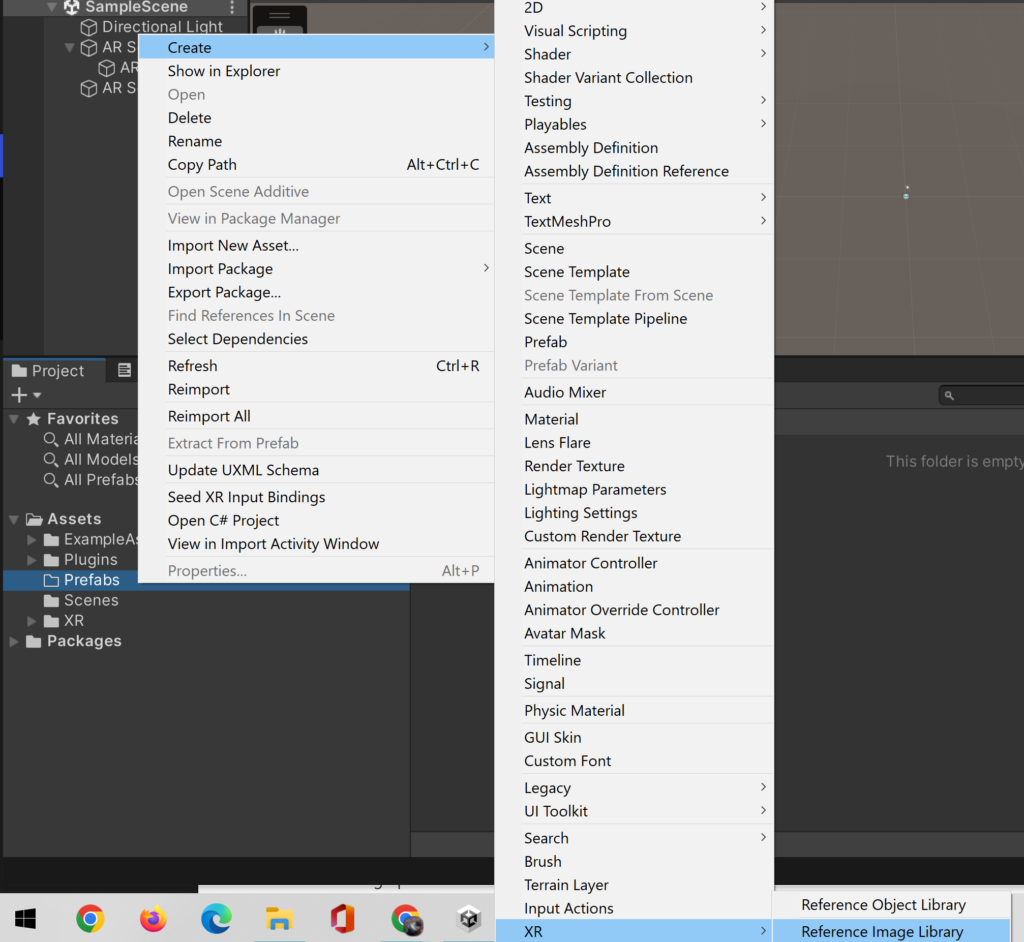
In the Prefabs folder create a new “Reference Image Library” and call it “Barcode Library”. All the QR Codes and barcodes we want to detect will be added here
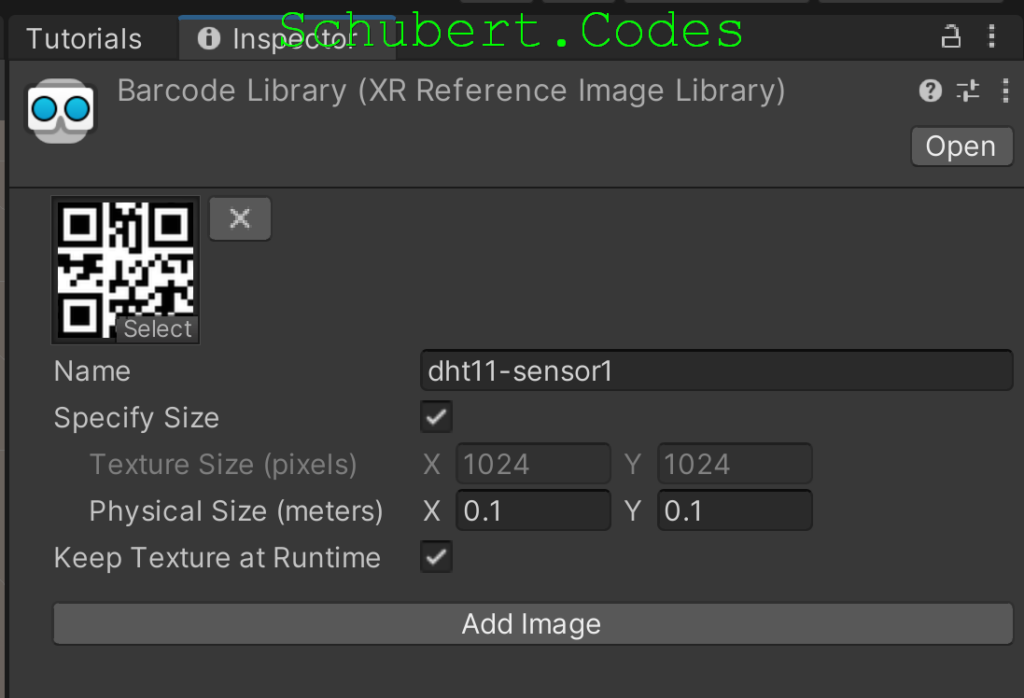
Click on “Add Image” in the Inspector Panel, usually on the right of the Unity Editor. Click the “select” in the image pane, this should bring up the “Select Texture2D” popover. Now select the QR code we uploaded earlier. Change the Name to “dht11-sensor1”, select “Specify Size” and enter 0.1 in the Y textbox and let X set itself. And check “Keep Texture at Runtime”. Your setting should look like this
Now we need something to appear over our QR Code. Let create a 3D cube that will appear over our QR code. Right click “Sample Scene”, “Game Object”, “3D Object” and then “Cube”
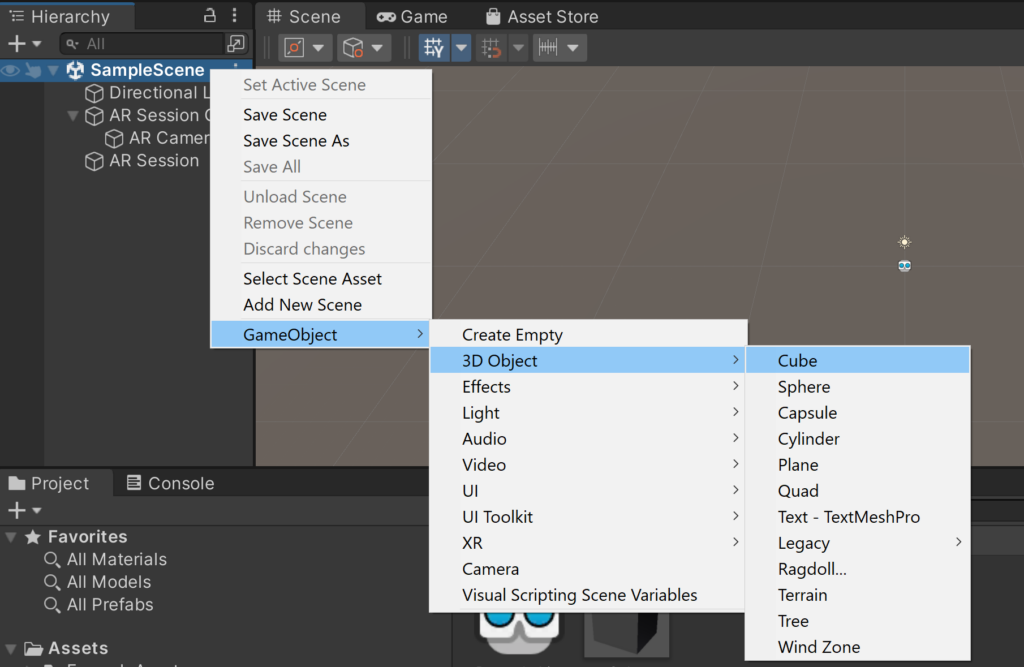
Then drag this Cube into the Prefabs folder and delete the original Cube. This will create a prefab that we can place over our QR Code when we point our mobile phone at the code in the real world. Update the perfab Cube scale to 0.1 in X, Y and Z.
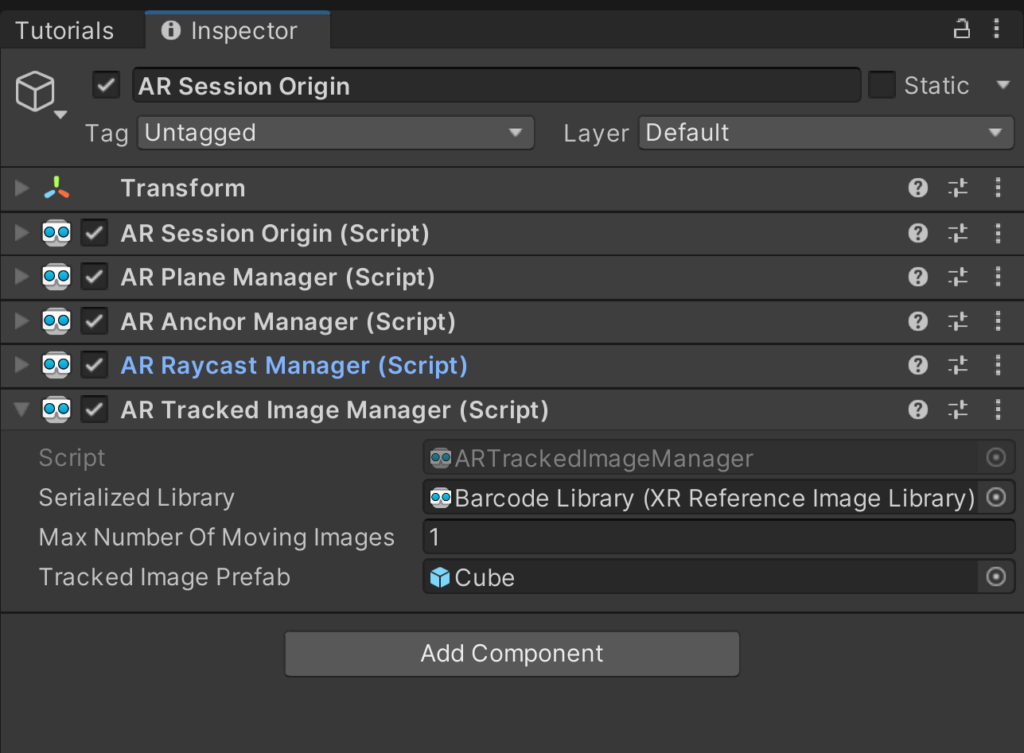
Now to piece it all together. Select AR Session Origin and click on “Add Component” and search for “AR Tracking Image Manager”. Set Serialized Library to our Barcode Library, set Tracking Image Prefab to our Cube prefab, set Max Number of Moving Images to 1. And Vola! The AR Manager will connect the dots, when it sees our QR code in the real world it will place our prefab over it.
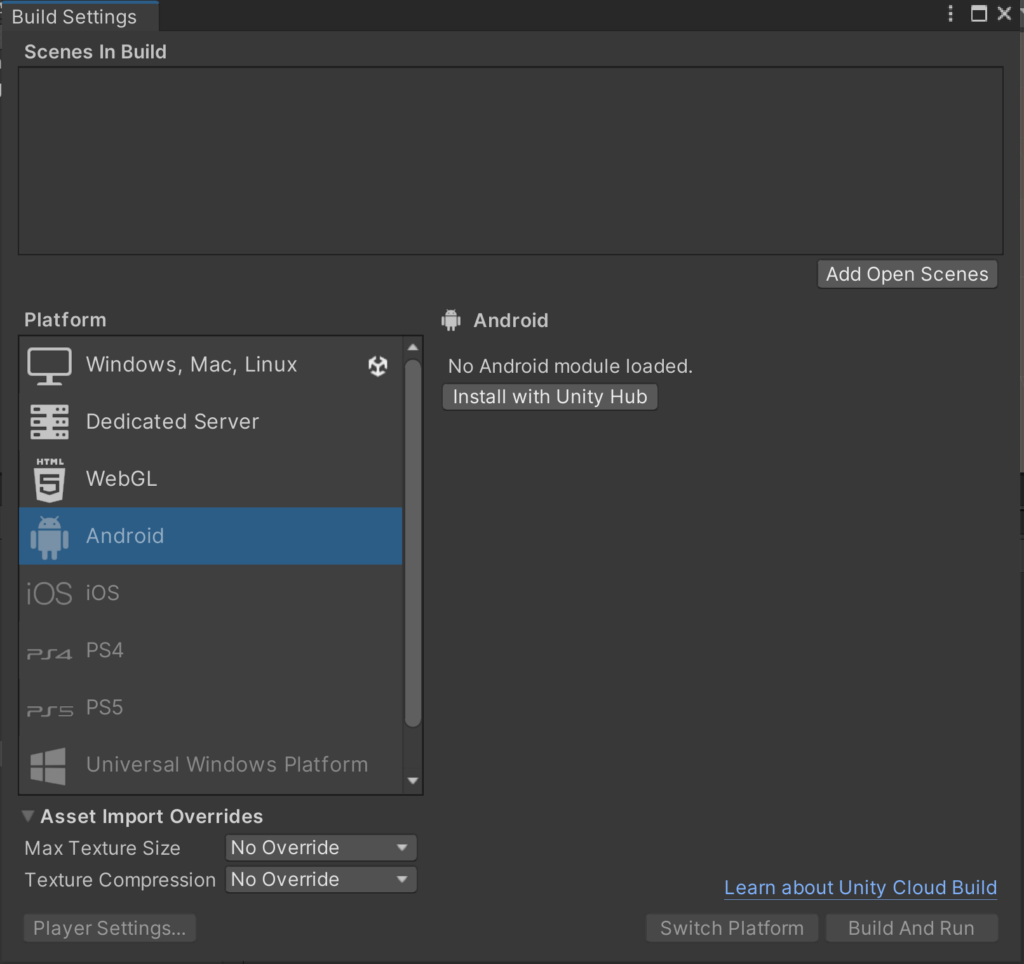
To Deploy our code on our Android devices, press CTRL + ALT + B or select the File menu and click on Build Settings … to get to the build settings. First select Android as the Platforms and click on “Switch Platform”. If your switch platform is disabled, click on “Install with Unity Hub” button. This will take you to the Hub screen where you can install the Android modules. After the modules are installed, come back and click “Switch Platform”.
After the platform has switched to Android, click on “Player Settings…”, under Other settings make sure Graphics API is set to “OpenGLE3”. Delete all the other Graphics API. If I don’t do this than when I build the project, it complains about an invalid graphics card. Scroll down and set the Package Name and set the Minimum API Level to “Android 8.0 ‘Oreo’ (API level 26)”. You can set it to a high level but this just means you application might not work on older phones.

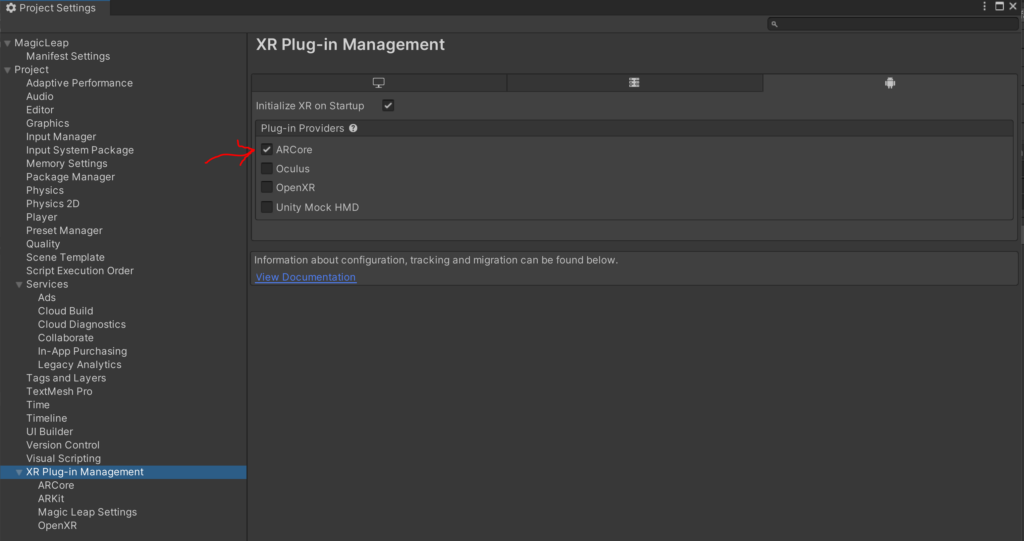
Another very important setting for Android, make sure ARCore is selected under XR Plug-in Management. Otherwise when you deploy your application to your Android, the AR application will start but the screen will be blank. This allow your application to access your phone camera. Close this windows and you should be back at the Build Settings screen.
Before we connect our Android phone and deploy our new AR application, we need to turn Developer mode on our Android phones. For my phone, I had to go to “Settings”, tap on “About Device”, scrolled down and tap seven times on “Build number”. Then go back to the “Settings” and scroll down to the bottom, “Developer Options” should appear. Click on this option and click ON. Now we can deploy our app as it is not an official android application.
Now connect your Android and click the “Build and Run” in the Build Setting screen. Sit back and relax as the initial build did take over 15mins for me but future builds were a lot quicker. The AR application should open automatically on your Android. Give our app the Camera permission and point at our QR code, and Vola! a white cube should appear over it.
Well done if you got your AR application showing a white cube over the QR code. We covered a lot of ground work this time and we got our base AR application in place. In my next blog we will explore calling our API and click back to our site using AR.
Happy coding!
