In my last blog post we saw how easy it was to secure an IIS site using a self-signed certificates. We used OpenSSL to generate the private keys and public certificates. We even understood what a recognised CA would do with a CSR. This time we are going to look at client certificates. This is used to confirm the identity of the client or any IoT device connecting to our IIS site. We will configure IIS to always request the client certificate and use ASP.Net WebAPI .netCore 5 to show the user’s name. We will also look at the same example using WebAPI .Net 6, as this has longer support. We will also look at some gotches, errors and other thoughts around client certificates.
Generate the Client Certificate
Let start by generating a self-signed client certificate using OpenSSL. Similar to securing a domain, we will need a device CSR to generate a device certificate. And to get a device CSR we need a device private key. It is very easy to generate a private key using OpenSSL, we can do:
openssl genrsa -out device007.key 2048After this we need a CSR. To generate a device CSR using the previous private key:
openssl req -new -key device007.key -out device007.csr Next, we need to create a device certificate. We will need to our root private key and our root public certificate. The command will look like:
openssl x509 -req -in device007.csr -CA myrootpublic.crt -CAkey myrootprivate.key -CAserial myrootpublic.srl -out device007.crt -days 365 -sha256Notice how we used -CAserial instead of -CAcreateserial parameter. This CAcreateserial parameter will create a new .srl file and this will contain the serial number used in the initial certificate. In our case the initial certificate was the domain certificate, the mysecuresite.org certificate. Using -CAserial mean the client certificate will contain the next serial number instead of generate a new serial number. This way we can sign sequence of certificates and they will have sequential serial numbers.
Next, we can combine our device private key and public certificate into a PFX file. This makes it easy to install.
openssl pkcs12 -export -out device007.pfx -inkey device007.key -in device007.crt -passout stdinFinally, to install the Client certificate, double click the pfx file. Click “Install Certificate” at the bottom and make sure the certificate is stored under “Personal” location. Because I’m using my laptop as the client and server I’ve installed both on the same machine, but if your client is another machine or IoT devices it need to be installed or used over there and not on the server. The private key only need to be with the client.
Update IIS SSL Settings
In order to get IIS to request the client certificate, you have to update the SSL settings of the site.

Under SSL Setting make sure Require SSL is selected and Client Certificate is Required.
Under Authentication, make sure Anonymous Authentication is enabled and the it is set to use the Application pool identity.

Gotcha 1 : you don’t need to install “IIS Client Certificate Mapping Authentication”. My understand is this is only needed if you want the app pool to run with a different account depending on the client certificate. If this is the case, you will need to install the feature and setup the mapping. The mapping can either be one to one i.e. one certificate to one user account or many to one i.e. many client certificate map to one user account. To do this click on “Configuration Editor” under Management of that site and navigate to “system.webServer/security/authentication/iisClientCertificateMappingAuthentication”. Set “enable” to true and then you can turn on the required mappings. In this case you could turn off Anonymous Authentication too

Gotcha 2: When we create a site in IIS, an app pool with the same name gets created under Application Pools. We can verify this by clicking on the Basic Settings of the site.

The User / Identity associated with this app pool is not a real user account and will not appear in the User Management Console. In my case the security identity (SID) is given the name “IIS AppPool\mysecuritesite.org” and this account needs access to the folder where the site files are kept, Database access, etc. You can read more about it here.
Gotcha 3 : I had to disable TLS 1.3 over TCP. Without this neither Chrome nor Edge requested the Client Certificate. I’m not sure if this is a bug or an implementation issue with TLS 1.3 but disabling this option popped up the client certificates when I browsed to my secure site

Create a .netCore 5 WebAPI that requests Client Certificates
In Visual Studio create a new ASP.Net Core Web API

We are going to call the project “IdentityAPIv5”

I’m using Visual Studio 2022, so it is telling me .Net 5.0 is Out of Support. But we going to get the client certificate working here and then look at the same implementation in .Net 6 next.

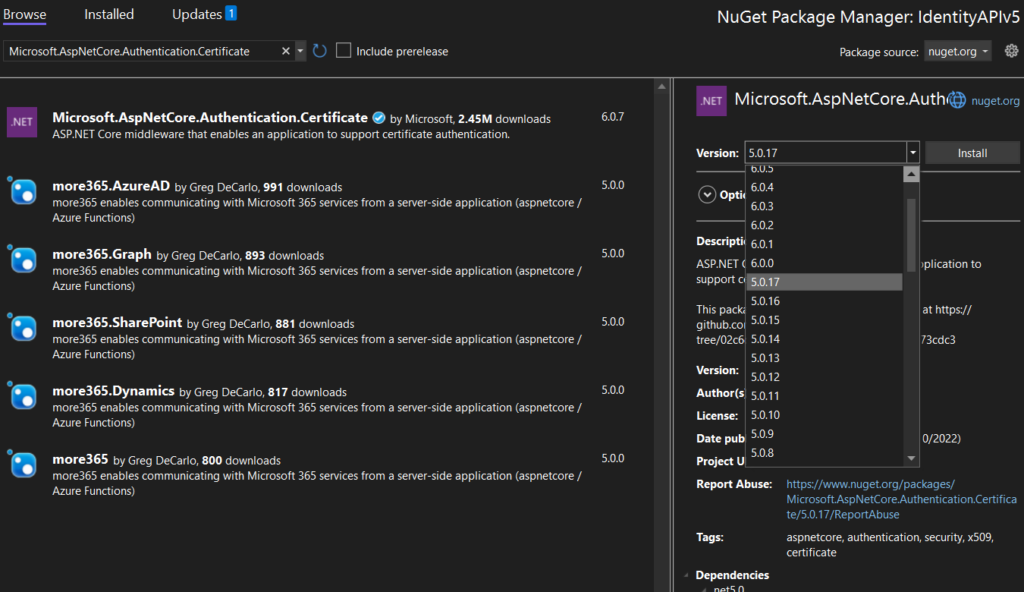
Next we need to add a nuget package “Microsoft.AspNetCore.Authentication.Certificate”. Make sure you choose the latest 5.0.x and not the 6.0.x.

Next update Program.cs, here we need to configure Kestrel to require the client certificate. The Program.cs should look like this after the update
using Microsoft.AspNetCore.Hosting;
using Microsoft.AspNetCore.Server.Kestrel.Https;
using Microsoft.Extensions.Hosting;

namespace IdentityAPIv5
{
    public class Program
    {
        public static void Main(string[] args)
        {
            CreateHostBuilder(args).Build().Run();
        }

        public static IHostBuilder CreateHostBuilder(string[] args) =>
            Host.CreateDefaultBuilder(args)
                .ConfigureWebHostDefaults(webBuilder =>
                {
                    webBuilder.UseStartup<Startup>();
                    webBuilder.ConfigureKestrel(o =>
                    {
                        o.ConfigureHttpsDefaults(o =>
                        {
                            o.ClientCertificateMode = ClientCertificateMode.RequireCertificate;
                        });
                    });
                });
    }
}
Next lets update the Startup.cs file. In the configuration service method we need to set the Authentication Scheme to certificate and we need to allow all certificates. In the Configuration we need to use the Authentication Middleware. The Startup.cs file should look like:
using Microsoft.AspNetCore.Authentication.Certificate;
using Microsoft.AspNetCore.Builder;
using Microsoft.AspNetCore.Hosting;
using Microsoft.Extensions.Configuration;
using Microsoft.Extensions.DependencyInjection;
using Microsoft.Extensions.Hosting;
using Microsoft.OpenApi.Models;

namespace IdentityAPIv5
{
    public class Startup
    {
        public Startup(IConfiguration configuration)
        {
            Configuration = configuration;
        }

        public IConfiguration Configuration { get; }

        // This method gets called by the runtime. Use this method to add services to the container.
        public void ConfigureServices(IServiceCollection services)
        {

            services.AddControllers();

            services
                .AddAuthentication(CertificateAuthenticationDefaults.AuthenticationScheme)
                .AddCertificate(options =>
                {
                    // Turn off revocation check
                    options.RevocationMode = System.Security.Cryptography.X509Certificates.X509RevocationMode.NoCheck;
                    // Allow all certificate types
                    options.AllowedCertificateTypes = CertificateTypes.All;
                });

            services.AddSwaggerGen(c =>
            {
                c.SwaggerDoc("v1", new OpenApiInfo { Title = "IdentityAPIv5", Version = "v1" });
            });
        }

        // This method gets called by the runtime. Use this method to configure the HTTP request pipeline.
        public void Configure(IApplicationBuilder app, IWebHostEnvironment env)
        {
            if (env.IsDevelopment())
            {
                app.UseDeveloperExceptionPage();
                app.UseSwagger();
                app.UseSwaggerUI(c => c.SwaggerEndpoint("/swagger/v1/swagger.json", "IdentityAPIv5 v1"));
            }

            app.UseHttpsRedirection();

            app.UseRouting();

            app.UseAuthentication();

            app.UseAuthorization();

            app.UseEndpoints(endpoints =>
            {
                endpoints.MapControllers();
            });
        }
    }
}
We are going to repurpose the WeatherForcastController.cs class. Rename it to UserController.cs and then we need to update the class to return the user name. We are going to add the Authorize attribute, this way only authenticated users can access this end point. The end result should look like:
using Microsoft.AspNetCore.Authorization;
using Microsoft.AspNetCore.Mvc;
using Microsoft.Extensions.Logging;

namespace IdentityAPIv5.Controllers
{
    [ApiController]
    [Route("[controller]")]
    [Authorize]
    public class UserController : ControllerBase
    {
        private readonly ILogger<UserController> _logger;

        public UserController(ILogger<UserController> logger)
        {
            _logger = logger;
        }

        [HttpGet]
        public string Get()
        {
            return $"Hello! your user name is {User?.Identity?.Name}";
        }
    }
}
We can build and now publish our project to IIS. When we browse to our site and choose invalid certificate, we get 403.16 – Forbidden

And if close and open the browser again and this time choose a valid client certificate

We get this, Vola!

Create a .net 6 WebAPI that requests Client Certificates
In Visual Studio create a new ASP.Net Core Web API, name the project “IdentityAPIv6” and this time choose .Net 6.0 (Long-term support).

Add the nuget package “Microsoft.AspNetCore.Authentication.Certificate” and choose the latest 6.0.x package. Next update Program.cs, here we need to configure Kestrel to require the client certificate. The Program.cs should look like this after the update
using Microsoft.AspNetCore.Authentication.Certificate;

var builder = WebApplication.CreateBuilder(args);

builder.Services.AddAuthentication(CertificateAuthenticationDefaults.AuthenticationScheme)
    .AddCertificate(options =>
    {
        options.AllowedCertificateTypes = CertificateTypes.All;
        options.RevocationMode = System.Security.Cryptography.X509Certificates.X509RevocationMode.NoCheck;
    });

builder.Services.AddControllers();

var app = builder.Build();

app.UseAuthentication();

app.UseAuthorization();

app.MapControllers();

app.Run();
Similar to our .netCore 5 project, repurpose the WeatherForecastController.cs and rename it to UserController.cs. The code should looks similar too
using Microsoft.AspNetCore.Authorization;
using Microsoft.AspNetCore.Mvc;
using Microsoft.Extensions.Logging;

namespace IdentityAPIv6.Controllers
{
    [ApiController]
    [Route("[controller]")]
    [Authorize]
    public class UserController : ControllerBase
    {
        private readonly ILogger<UserController> _logger;

        public UserController(ILogger<UserController> logger)
        {
            _logger = logger;
        }

        [HttpGet]
        public string Get()
        {
            return $"Hello! your user name is {User?.Identity?.Name}";
        }
    }
}
After deploying the code we should get similar results. When we choose an invalid certificate, we should get the 403.16 Forbidden. When we choose the valid client certificate, we should get our user name, which should be the Common Name (CN) from the client certificate

and

Happy Coding!
